
Full guide: two entry zones, three prices, take-profits, bot stop, validity window, and trade management.
Disclaimer. This material is for educational purposes only and is not individual financial advice. Futures trading carries the risk of partial or full loss of margin. All decisions, position size, leverage, and personal stop are yours — at your own risk.
What is AXON Dump Radar
AXON Dump Radar is a crypto trading bot that scans the futures market and looks for tokens after a sharp or drawn-out pump. Its job is not to guess the absolute top. Radar waits until an overheated move starts losing steam, then builds a SHORT scenario with an entry zone, take-profits, stop, and validity window.
Why short signals on crypto, not longs? Because Radar specializes in a specific market situation: after a strong rise, a token often develops imbalance — early buyers take profit, late participants stay inside an overheated move. A pullback down in that structure sometimes plays out faster and cleaner than trying to chase another leg up. That does not mean every pump must end in a dump. It means the bot looks only for situations that fit its model.
Radar does not trade for you, does not open positions automatically, and does not turn crypto trading into autopilot. It gives you a ready-made scenario and saves time on the search. Whether to open a trade, what size to use, and where to place your personal stop — that is the trader's call.
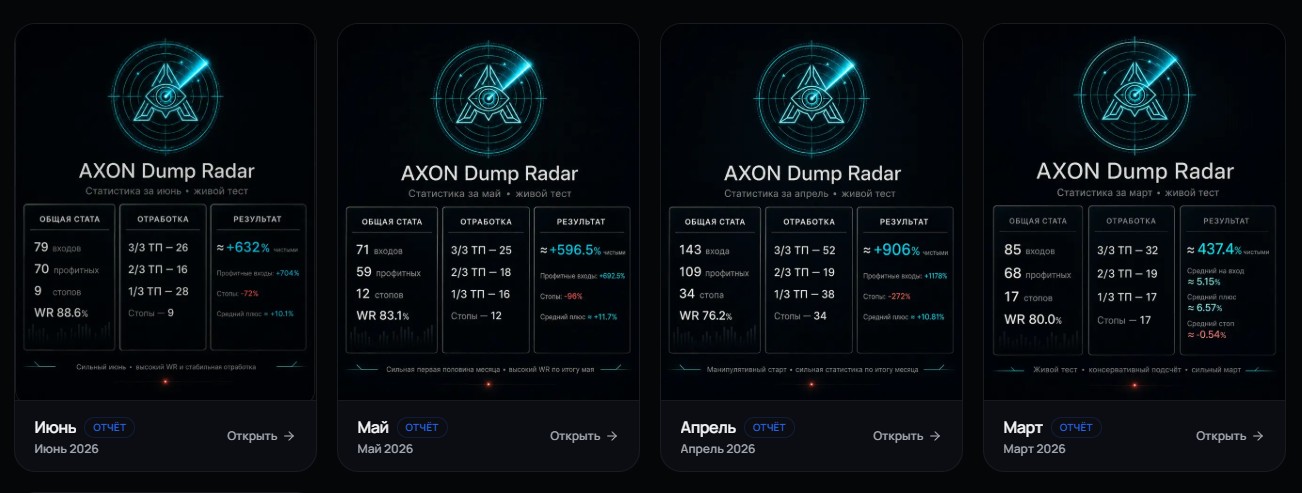
You can check current stats in the open section: public AXON Dump Radar statistics. Stats are not there to make promises — they help you evaluate the system over time, including take-profits and stops.
What an AXON Dump Radar signal consists of
Below are the elements you need to read before opening a position. The same signal can look simple, but each line answers a separate question: what to trade, where to build the entry, how far price has already moved, where to lock in the move, and when the idea stops being valid.
Asset ticker
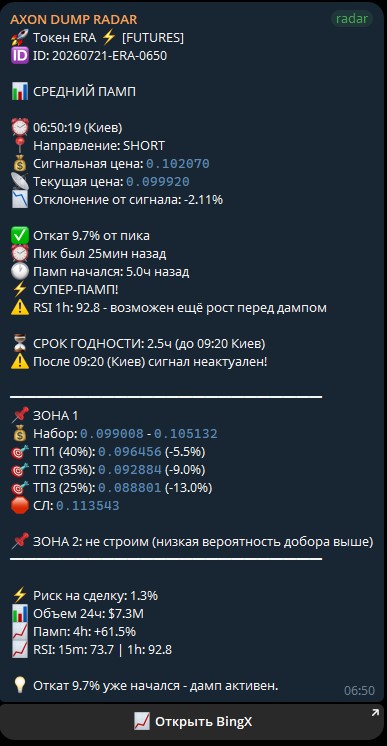
The ticker is the futures contract symbol — LA, ERA, or another asset. Radar builds the signal from BingX data, so chart, price, and orders must be checked on BingX Futures. On another exchange the price can differ, which means the entry zone, take-profits, and stop will no longer match the bot's calculation.
Zone 1 and Zone 2
The entry zone is a price range, not one perfect point. The market moves every second, and the bot checks many contracts in parallel, so it gives you a working window where you can build an entry with several limit orders.
A signal can have two zones. Zone 1 is the main scenario. Zone 2 is built higher when the algorithm sees a chance of an extra push up before the drop. Sometimes Radar explicitly says not to build Zone 2: that means the probability of a higher add-on is considered low, and you should not invent a second zone on your own.
If Zone 1 closed on stop and Zone 2 is present while the signal is still valid, Zone 2 can be treated as a separate attempt. You can also skip a re-entry entirely. This is not automatic averaging and not an obligation to "win back" the first stop: risk is recalculated from scratch, the signal window is checked again, and the trader decides. In my experience, the second zone often gives a cleaner entry, but there is no guarantee — and price reaches it very rarely.
Three prices in the signal
The message contains three different reference points that must not be mixed up.
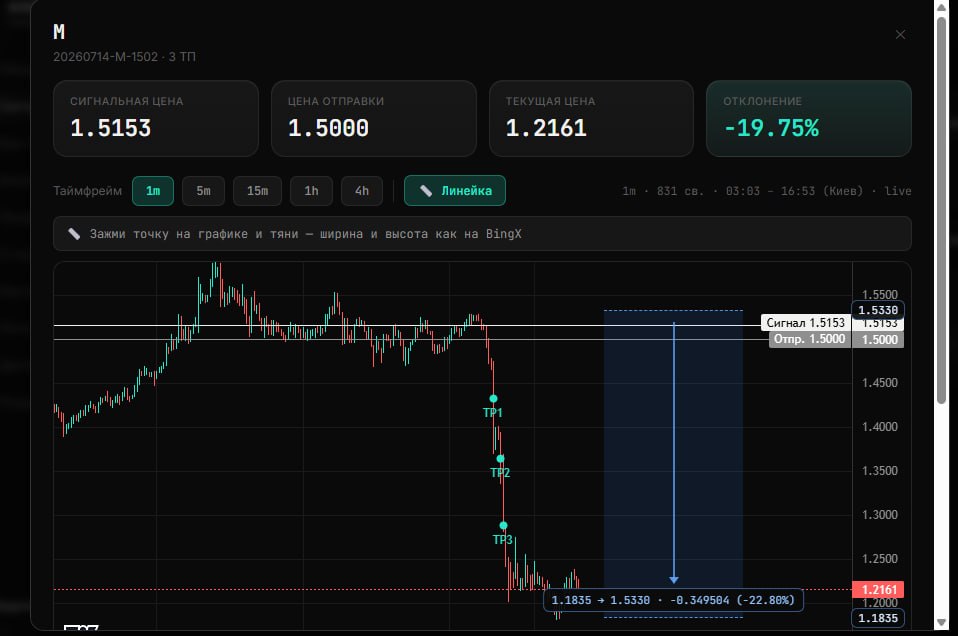
- Signal price — the price at which Radar locked in the ready setup.
- Current price — the contract price at the moment the message was sent to the chat.
- Deviation — the difference between current and signal price in percent.
Deviation shows whether the market moved while the message was reaching you. A small value usually means the signal is still close to the original logic. A large negative deviation means part of the drop already happened: entry is lower, distance to stop is longer, and potential move to take-profits is shorter. A positive deviation means price rose above the signal price and may sit closer to the upper part of the zone — but that is not automatic permission to short a rising "stick."
Example LA. Signal price 0.065230, current price 0.063350, deviation −2.88%. The token already covered part of the move down. If someone enters at the current price, their geometry is worse than for someone who saw the signal right away: farther to SL, closer to TP.
Take-profits TP1, TP2, and TP3
TP1, TP2, and TP3 are three profit-taking levels. Multiple targets exist because nobody knows the dump depth in advance. The base AXON scheme is to close 40% of the position at TP1, 30% at TP2, and the last 30% at TP3.
That is not the only valid approach. You can close the full position at the first take if you prefer to grab the move quickly. You can hold to the second or third take if you accept pullbacks. The main thing is to pick a scheme before entry, not change it after every candle. Detailed position sizing, limits, and management are in the second article: how to enter AXON Dump Radar signals.
Bot stop — validity boundary, not your personal stop
This is the point people confuse most often. SL in the Radar message shows the price after which the original short idea is considered broken. It is the setup's validity boundary, not a command for every trader to hold the position until that level.
The stop is usually placed roughly 10% above the upper edge of the zone. At x10 leverage, such a move sits near the limit an Isolated Margin position may not physically survive. So you cannot simply open a large size at the bottom of the zone and assume the bot stop automatically caps the loss. Your personal monetary risk depends on position size, actual entry, leverage, and available margin.
Your personal stop can match Radar's stop, but then the position must be sized from the full distance to that price, and effective leverage chosen so liquidation sits beyond SL. You can place a tighter personal stop by structure. I break down that math in how to enter AXON Dump Radar signals; risk distribution models across entries are in part three: four scaling strategies.
Stops are part of the work, not proof the bot "broke." If the very fact of a loss makes you increase leverage, remove SL, or rescue the position, read Who's afraid of losses first.
Signal validity window
A signal is valid for a limited time — usually from 2.5 to 8 hours depending on pump type and duration. The message states the exact end time in Kyiv time. After that, do not open a new position on the old zone: the market may have changed structure, and Radar's calculation no longer applies to the current situation.
If the window expired and you are already in a position, look not at the timer alone but at the state of the trade:
- Position in profit — protect the result: move stop near entry, optionally take partial profit, and continue managing the remainder.
- TP1 or TP2 already hit — you can hold the rest toward the next target per your pre-chosen plan.
- Position in loss — you can close the loss, reduce size, or wait for a return to breakeven. Leaving it after expiry is acceptable only on your own chart read and with clear risk. Radar no longer confirms a new entry.
After expiry you cannot add size without a fresh calculation just because "the token should drop eventually."
How to manage a trade after entry
Radar looks for movement down. So management is built not around catching the perfect low, but around a simple task: when the market already gave a normal impulse in our direction, risk must come off.
The 4% clean-move rule
If price moved roughly 4% in favor of the SHORT position, that is already a full move played out. At effective leverage around x10, that roughly corresponds to about +40% ROI on margin used before fees — though the real result depends on entry and actual leverage.
After such a move, at minimum move stop near the weighted average entry including fees. Beyond that, the trader chooses: take partial profit, fully lock in, or continue toward TP1–TP3. But leaving the original risk and then catching a stop or liquidation after the market already handed you 4% — that is a management mistake, not a Radar mistake.
Meaning of the rule. The bot is not obliged to bring price exactly to a pretty TP line. Its job is to find a clean move down. If the move is already there, your job is to stop risking the original loss.
“Rat moves”: when the take is almost hit
In Community we call a "rat move" a situation where price missed the take by literally a few ticks or 0.3–0.5% of clean movement, then started reversing. The market is not obliged to hit the level dead center.
For example, TP1 sits at 0.061642, and the low was 0.06180. About 0.26% remained to the target. In that situation it is reasonable to manually take the planned portion of the position and move the remainder's stop to entry. Inside Radar statistics such a setup may count as worked, because the actual move toward the target was received almost in full.
There are not many such cases, especially when the token really starts dumping. But know the rule in advance: do not turn a good profit into a full stop over a few missing ticks.
How the bot finds overheated tokens
I do not disclose Radar's exact thresholds and internal formula — that is the working part of the product. But the general logic is useful to understand. The bot looks not at one indicator but at a combination of signs: move strength across several time windows, RSI, 24-hour volume, current volume spike, pump age, time since peak, pullback size, and whether price is still accelerating right now.
Parameters were tuned on real signals and are constantly checked against statistics. Radar does not use "AI that sees the future," does not copy others' signals, and does not take ready recommendations from TradingView. It is an algorithmic filter that searches for a repeating market scenario and delivers it in a readable format.
What Radar does not do
- Does not open or close trades for you.
- Does not guarantee every signal works. Stops will happen, and they must be built into the risk model.
- Does not know your deposit size, psychology, or acceptable drawdown.
- Does not replace the chart, especially if the token keeps rising on vertical candles.
- Does not give a "sell at any price" command. It shows a zone where a SHORT scenario may play out.
Bot signals are a decision tool. Execution responsibility stays with the trader.
How to tell if a specific signal is worth taking
Radar already did basic filtering. But before entry it helps to spend a minute on the chart — especially if the message did not arrive just now, price sits above the zone, or the token looks aggressive.
How the token rises: "sticks" or normal structure. Long green candles that keep updating the high without a normal pullback — reason to wait. While impulse accelerates, the entry zone is not obliged to stop price. I sit out "sticks" and return to the scenario after candle bodies shrink, upper wicks appear, the first reaction down, or a failed high update.
Is there a blow-off and chaotic spikes. If the chart flies up and down on long candles, levels break without reaction, and spread and slippage become abnormal, you can skip the trade. Radar finds a mathematical setup but does not obligate you to enter a structure where risk cannot be limited calmly.
What is funding. Strongly positive funding can show overcrowded longs but also warns of high volatility. Strongly negative funding means shorts are already crowded and the risk of a new push up is higher. Funding is extra context, not a separate entry button.
Is the token moving "tight" or calmly. "Tight" means price barely gives pullbacks, quickly buys red candles, and keeps updating the high. A calm pump more often gives readable reactions and levels behind which you can cap the stop. The more aggressive the move, the less desire to guess the top.
Known asset or fresh junk. New listings and tokens without history can move longer and sharper than ordinary technical logic expects. If you do not understand the asset's character, reduce risk or skip the signal. In AXON Community you can cross-check context with other traders.
Are there levels on 1H and 4H above. Check whether a strong historical level, round price, or liquidity zone sits nearby that the token might get pulled to before dropping. That does not cancel the signal but helps decide whether to enter now, leave part of size higher, or wait for a reaction.
Summary: what to remember
- Radar looks for SHORT scenarios after overheated pumps but does not trade automatically.
- The entry zone is a range. A signal can have main Zone 1 and a separate Zone 2 higher.
- Signal price, current price, and deviation show how far the market moved from the original setup.
- Radar SL is the idea's validity boundary. Your personal stop and monetary risk are calculated separately.
- After the validity window ends, do not open a new trade. An open position is managed by profit, structure, and your own risk.
- After 4% clean movement, remove the original risk. If 0.3–0.5% was missing to the take, manually lock in a "rat move" and protect the remainder.